
Tabs
Tabs keep several documents or whiteboards open so you can switch between chapters, character profiles, and outlines with a click. To view two items at once, combine tabs with split view.
Enable Tabs
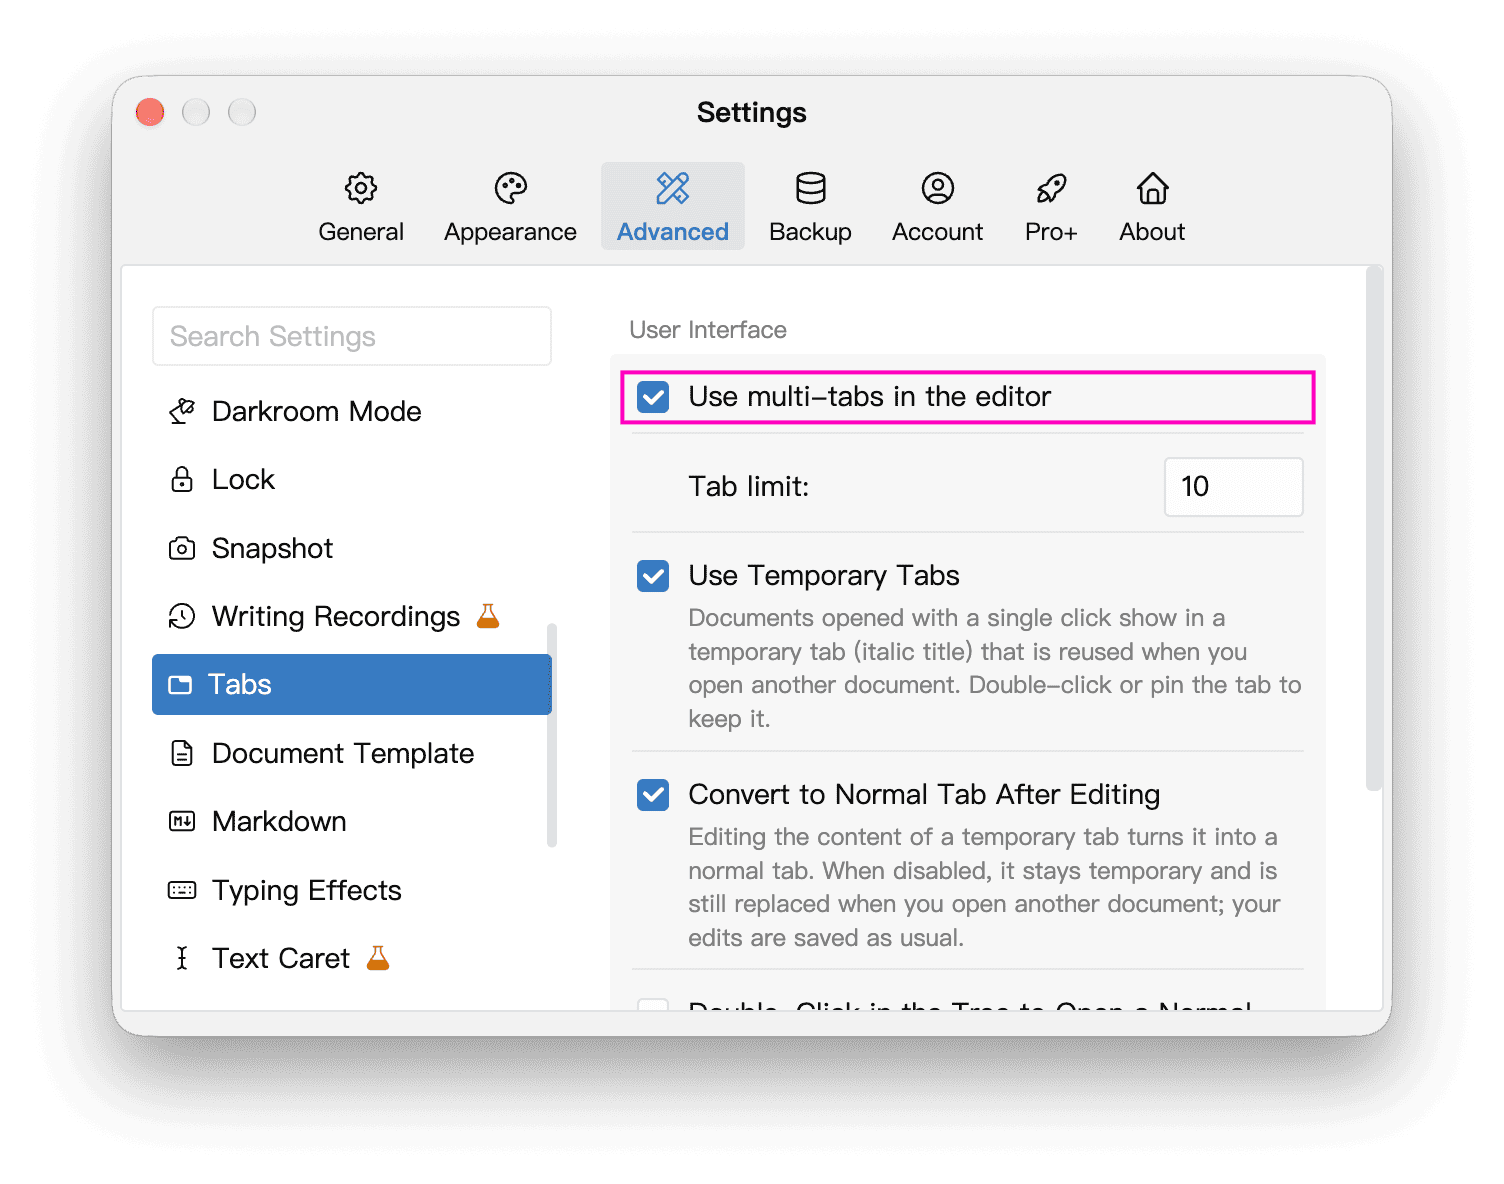
Tabs are off by default. In Settings → Advanced → Tabs, enable Use multi-tabs in the editor to show the tab bar at the top of the editor.
Open, Switch and Close Tabs
Opening a document or whiteboard from the tree displays it in the tab bar. Click an existing tab to switch to it. You can also drag a document from the tree onto the tab bar to open it, or drag tabs to reorder them.

Click the × on the right of an unpinned tab to close it. You can also right-click a document tab to:
- Close that tab, or use Close Others or Close Tabs to the Right to close several tabs;
- Choose Show in Floating Window to open the document in a separate window;
- Star or unstar, and lock or unlock the document;
- Pin or unpin the tab;
- Copy the title, or the title and content.
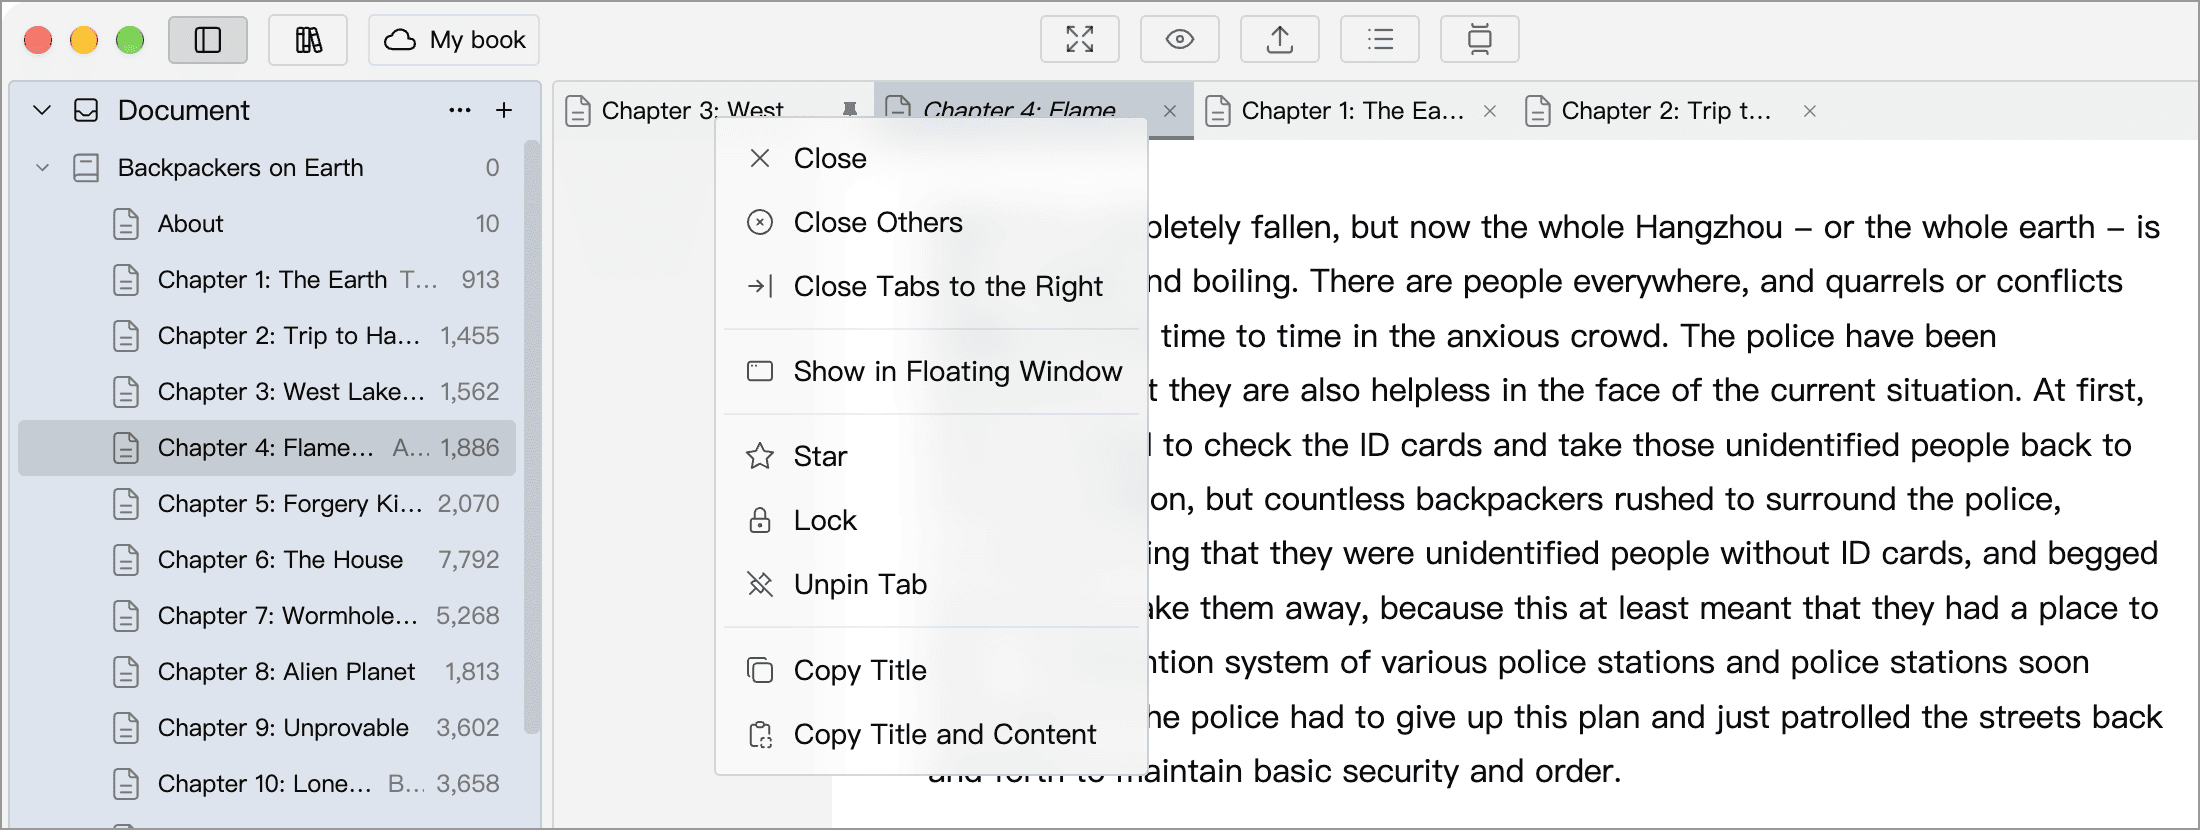
Closing a tab removes it from the tab bar without deleting the document. Close Others and Close Tabs to the Right leave pinned tabs open.
Tab Limit
Adjust the Tab limit in Settings → Advanced → Tabs. The default is 10, and only unpinned tabs count toward this limit. In split view, each pane has its own limit.
If opening a new tab would exceed the limit, the least recently used unpinned tab closes automatically. Pin tabs that you want to keep available.
Pinned Tabs
For documents you refer to frequently, such as character profiles or outlines, right-click the tab and choose Pin Tab. Pinned tabs appear at the front of the tab bar, do not count toward the tab limit, and are not closed by Close Others or Close Tabs to the Right. A pin icon appears on the right of a pinned tab, distinguishing it from a normal tab.

To unpin a tab, right-click it and choose Unpin Tab. To close an individual pinned tab, choose Close from its context menu.
Pinning a tab keeps it available for switching; it does not keep its content visible on screen or lock the document against editing. To keep reference material visible in one pane, see Keep a Document in One Pane.
Temporary Tabs
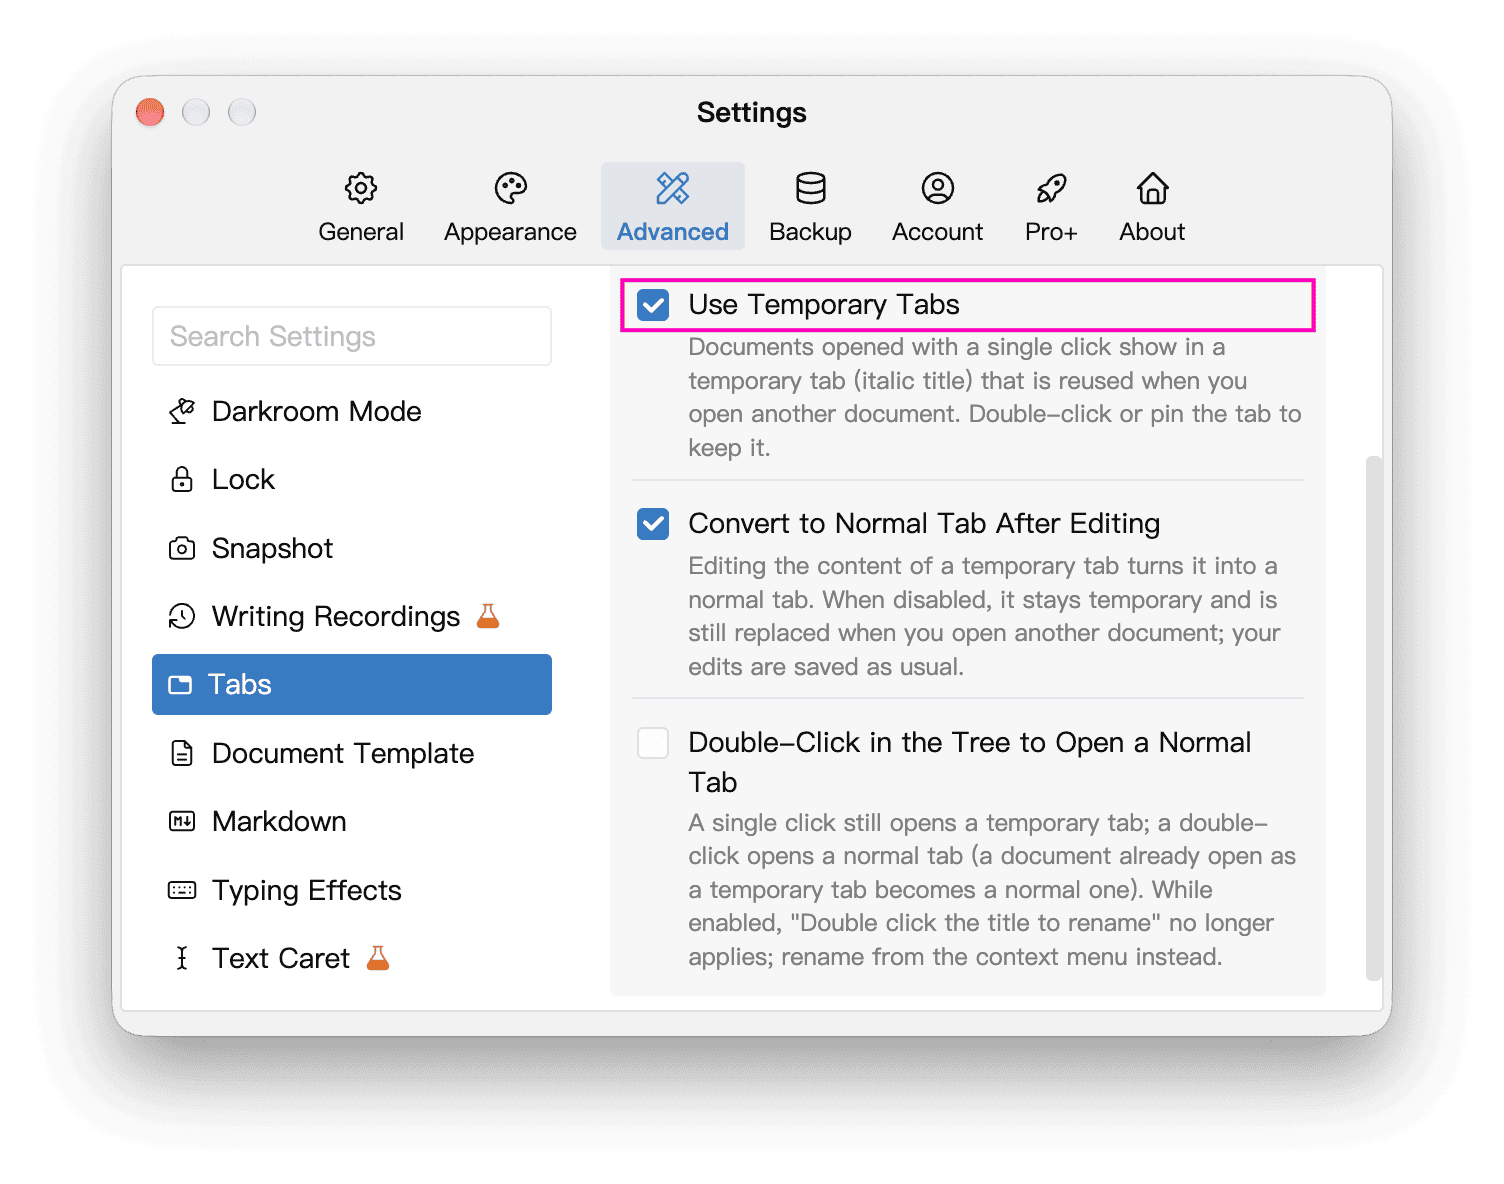
If you are browsing documents in the tree and do not want a new tab for every click, enable Use Temporary Tabs in Settings → Advanced → Tabs. This option is off by default and requires tabs to be enabled.
With this option on, clicking a document in the tree that is not already open displays it in a temporary tab with an italic title. Browsing another document that is not already open replaces this tab in place. Each pane can have at most one temporary tab. Clicking a document that is already open switches to its existing tab.

Replacing a temporary tab leaves the document in the tree, and its content is saved as usual. “Temporary” only means that the tab is reused.
To keep a temporary tab, double-click it or drag it to another position to turn it into a normal tab. Alternatively, right-click it and choose Pin Tab to make it a pinned tab. All of these actions remove the italic styling and prevent the tab from being replaced as you browse. Normal tabs still count toward the tab limit; pin a tab if you want to keep it available regardless of that limit.
Temporary tabs have two additional options:
- Convert to Normal Tab After Editing: on by default. Editing the content turns the temporary tab into a normal tab. With this option off, an edited temporary tab may still be replaced as you browse, but its content is saved as usual.
- Double-Click in the Tree to Open a Normal Tab: off by default. When enabled, a single click opens a temporary tab and a double-click opens a normal tab. Double-clicking a title in the tree no longer renames it; use the context menu to rename the document instead.
Turning off Use Temporary Tabs converts existing temporary tabs to normal tabs without closing them.
You can also use tabs in split view. To move a document into a separate window or return it to the main window’s tabs, see Floating Window.