Library
Library is the folder WonderPen uses to save documents and data, usually ending in .wplibrary.
When first launched, WonderPen will show you an interface similar to the following:

Click + Open or Create to open or create a library.
Open or create a new library
Section titled “Open or create a new library”After entering the main interface of the editor, you can click the Library button on the left side of the top toolbar to open the library drop-down list, as shown in the following figure:
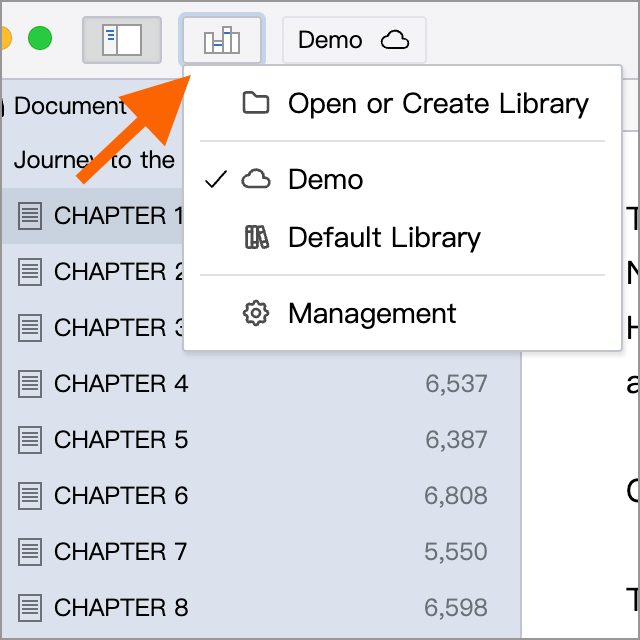
This drop-down list will list the recently opened libraries (the default library will always be in the list). You can open or create a new library here, or click on other libraries to switch.
Click Open or Create Library in the menu, and the interface for opening or creating a library will pop up, as shown in the figure below. Of course, you can also operate by clicking the Open or Create Library menu item in the File menu at the top.
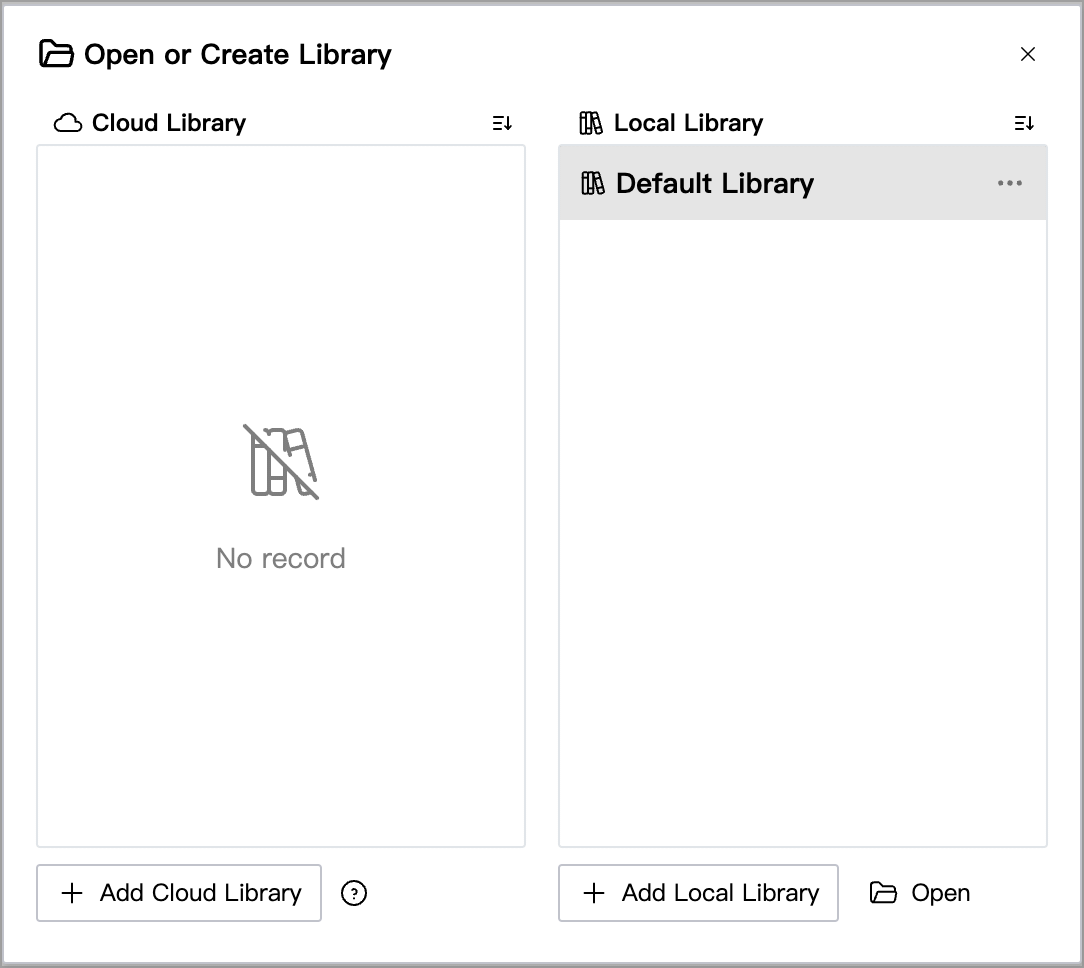
Libraries are divided into two categories: Cloud Library and Local Library. As the name suggests, the data in the cloud library will be synchronized to the WonderPen server, allowing you to synchronize your writing progress between different devices; the data in the local library is completely stored locally and will not be uploaded to the WonderPen server.
You can choose which library to create according to your needs. For more instructions, see the New Library chapter.
You can also right-click on the library and Open in New Window to open the specified library.
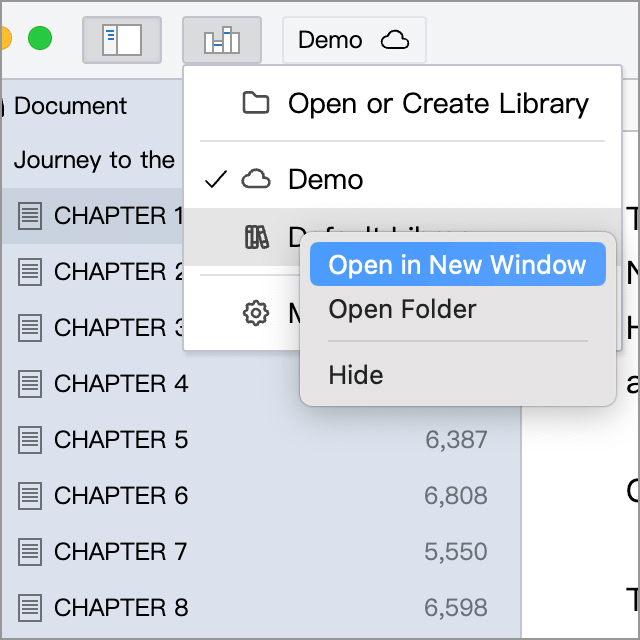
WonderPen 2.0 begins to support multi-window mode. You can open the same library in multiple windows, or open different libraries in multiple windows. If you need to refer to the content of the current library or other libraries during the writing process, multi-window mode should be a good choice.
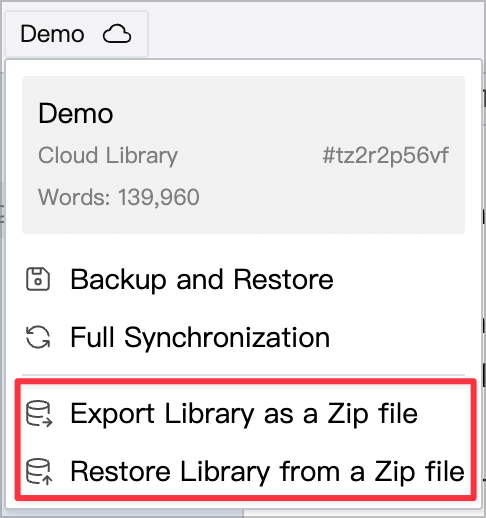
Library Info
Section titled “Library Info”Click the name of the library on the left side of the top toolbar to view the information of the current library in the pop-up menu, as shown in the following figure:
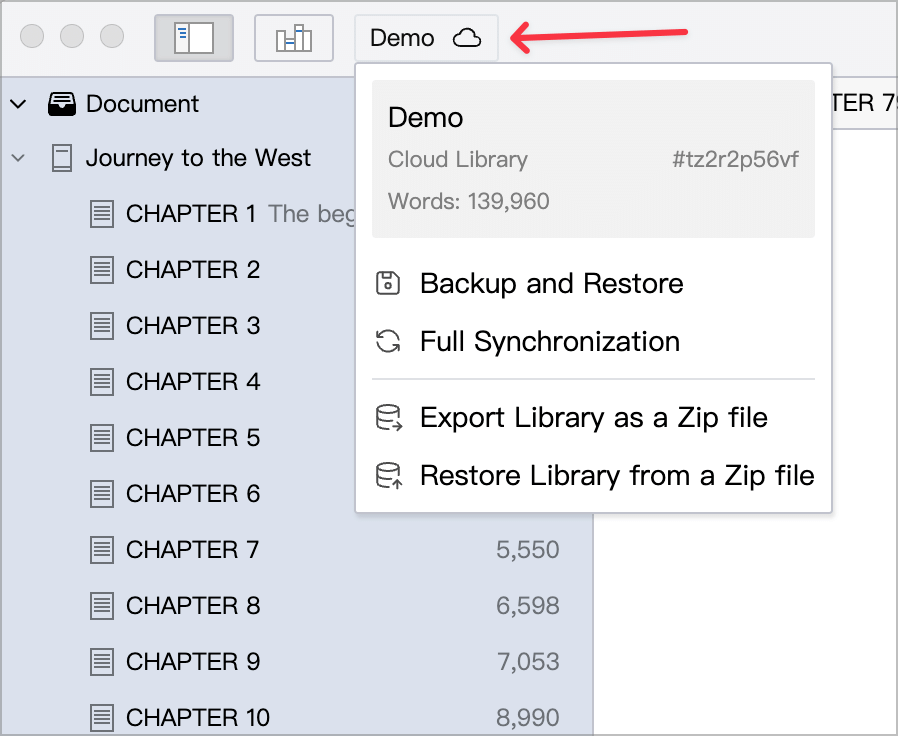
Key information includes:
- Library name
- Library ID (only available for cloud libraries)
- Total number of words of the library
You can also back up, import, and export the library here.
Export the library as a Zip file
Section titled “Export the library as a Zip file”The library can be exported as a Zip file so that you can back up, migrate, and share data.
Click the name of the current library on the top toolbar, and in the pop-up menu you will see the options Export Library as Zip file and Import Library from Zip file, as shown in the following figure:
For specific operations, please refer to the Export as Zip File section.
The Default Library Deprecated
Section titled “The Default Library ”DeprecatedIn version 1.x and 2.x, to help new users get started quickly, WonderPen will automatically create a default library when first launched. If you have not set up a library, WonderPen will save documents and data in the default library. The default library is located in the data folder allocated by the system for WonderPen. For the specific location, please refer to this document.
The default library cannot be moved, but if necessary, you can copy it to another location, or export it first, and then import it into a newly created library.
Starting from version 3.0, WonderPen no longer automatically creates a default library. To start writing, you need to manually create a library, or select an existing library at startup. If you no longer need the default library, you can delete it in the open or create library interface.
How to move or rename a library?
Section titled “How to move or rename a library?”Please refer to How to rename a library?
About data synchronization of library
Section titled “About data synchronization of library”The cloud library has its own synchronization function. When the content changes, it will be automatically synchronized to the WonderPen server. When you open a new cloud library, the latest data will be automatically downloaded from the server.
The data of the local library is stored locally in the form of folders. When you create a new local library, you can place the corresponding folders in cloud disk directories such as Dropbox, OneDrive, Nut Cloud, Baidu Netdisk, and Tencent Weiyun to synchronize data on different computers. For more details, please refer to the chapter Sync with Cloud Drive.